Polyhedra Network: Testnet Review and Guide


Investments into the Polyhedra Network. Source: cryptorank.io
Adding Networks
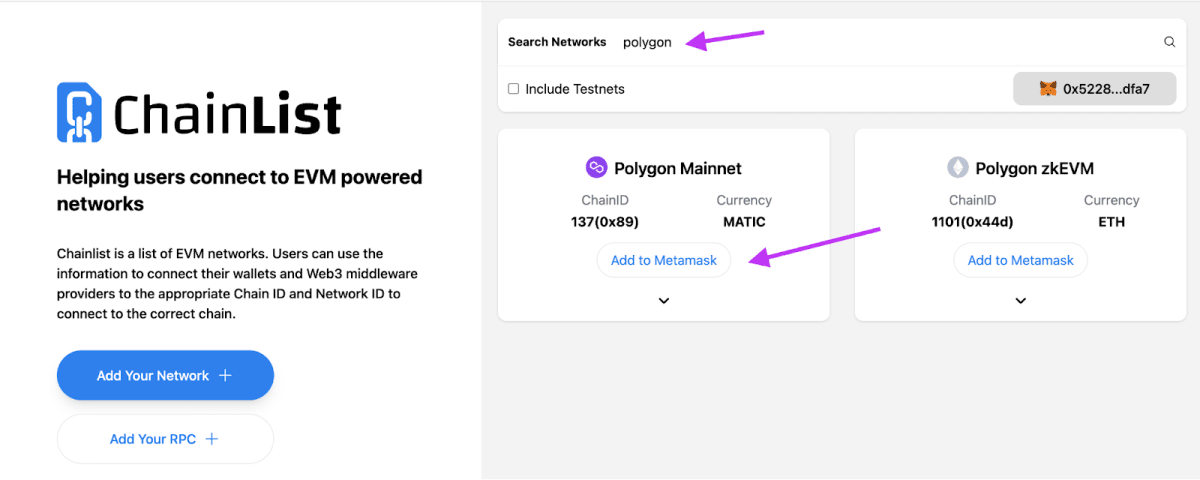
- Connect your MetaMask wallet to ChainList.org and add Binance Smart Chain Mainnet, Polygon Mainnet, Fantom Opera, and Avalanche C-Chain.


How to add networks. ChainList.org
Refill Your Wallet
- Top up your MetaMask wallet on the Binance Smart Chain (BEP20) network with around $10-13 using your preferred method.
Get Test Tokens
- You'll need to buy a bit of MATIC tokens, approximately $2 in value. We'll use this bridge as an example, chosen for its low fees. You're free to transfer MATIC from your exchange or use any other bridge you prefer.

Token Swap Bridge. Source: Router.via.exchange
Transferring NFT from BNB Chain to Polygon
- Click the link, connect your wallet, choose the Binance Smart Chain network, and tap the NFT Faucet button.

Requesting NFTs. Source: zkbridge.com
- Pick BNB Chain and press the Request button
- Head back to the NFT tab. Choose the network, hit the Import my NFT button, and select your freshly minted NFT.

Importing NFTs. Source: zkbridge.com
- Afterward, hit the Confirm import button, select Polygon under Receiver Blockchain, and tap the Next button

Choosing Polygon Network. Source: zkbridge.com
- Scroll down a bit, press Step 1, followed by Step 2

Confirming NFT Transfer. Source: zkbridge.com
- Collect your NFT on the Polygon network: press the Claim button. MetaMask will prompt you to switch networks; proceed with that and sign off on the transaction.

Claiming NFTs on Polygon Network. Source: zkbridge.com
Moving NFTs from BNB Chain to Avalanche
- Following the steps from before, do the same again: refresh the page, select the Binance Smart Chain network, and press the NFT Faucet button.
- Choose BNB Chain and tap the Request button.
- Return to the NFT tab → Import my NFT → choose your NFT and click Confirm.
- Please note! his time in Receiver Blockchain, pick Avalanche, then press Next → Step 1 → Step 2.
- Claim, sign the transaction, and wait for its completion.
Creating Your NFT and Shifting It to the Fantom Network
- Refresh the page and hit Create an NFT (next to the NFT Faucet button).
- Select an image from your computer.
- In the NFT description, put any title and a simple, harmless couple-word description. Select BNB Chain for the network, leave the rest as it is, and press Create.

Creating an NFT on BNB Chain. Source: zkbridge.com
- In the next window, pick zkBridge for NFT

Shifting the created NFT to Fantom network. Source: zkbridge.com
- In Receiver Blockchain, choose Fantom, and press Next → Step 1 → Step 2
- Claim, sign the transaction, and patiently wait for processing.
- Snap a screenshot of the successful transaction, ensuring your wallet is visible on the right for future reference.

Successful transfer of the NFT from BNB Chain to Fantom. Source: zkbridge.com
Sending Messages
- Navigate to the provided link. Ensure everything is selected as displayed in the screenshot. Leave the message content as default. Scroll down and click Send a Message

Sending a message to the Polygon network. Source: zkbridge.com
- Once the transaction is successfully processed, choose Send another message

Transaction processed successfully. Source: zkbridge.com
- Now we're dispatching from the BNB Chain to Combo Network, press Send message.
- Likewise, send messages to other networks, in sequence: BNB Chain → Fantom, BNB Chain → Gnosis Chain, BNB Chain → Moonbeam
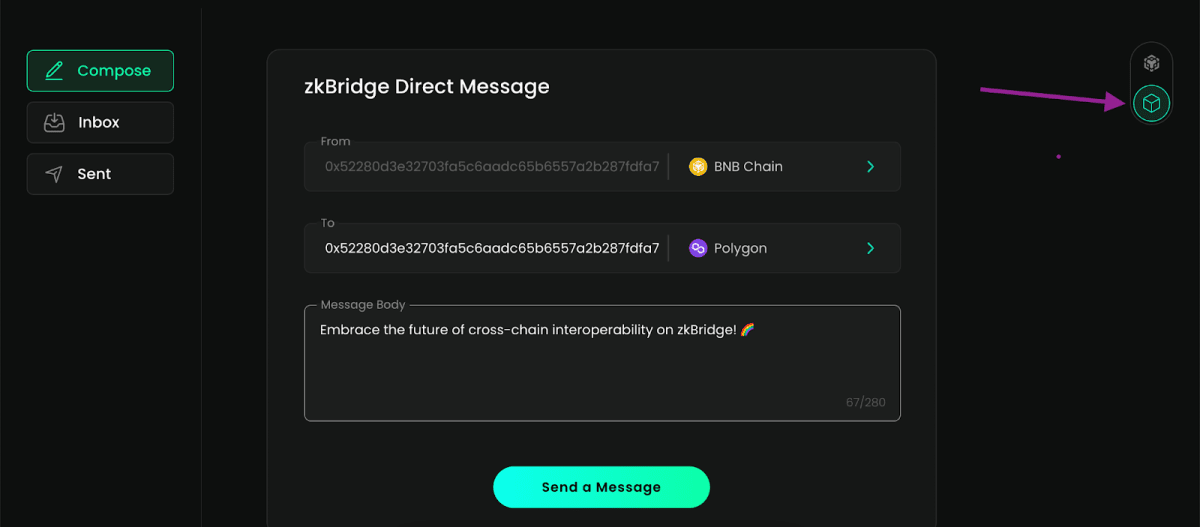
- Switch to Direct Message and dispatch messages to all networks as in the preceding steps.

Sending Direct Messages to the Polygon network. Source: zkbridge.com
- Preserve the final screenshot, ensuring your wallet is visible

Successful Direct Message dispatch transaction. Source: zkbridge.com
Leaving a Review
- Hop over to the project's Discord and pen a review. Remember to attach the two screenshots we preserved earlier and the wallet number where the testnet transactions were conducted.

